
In this post, we will discribe how to configure Always On for MS SQL Server Enterprise 2022 with a focus on a two-node cluster. First and foremost, we assume that the server configuration and drive for both nodes are exactly the same, and MS SQL Server 2022 has been installed on both nodes. Additionally, we need to ensure that during the installation process, both the Database Engine Services and SQL Server Replication are checked and installed without any errors.
Let's describe the details step by step as follows:
Step 1: Change MS SQL Server service account to
Administrator following below steps

Step 2: Enabling Always On Availability groups for MS SQL Server

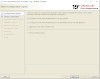
Step 3: After changing configuration restart the database.

Note: Perform the above steps on both nodes of the cluster
Step 4: Now open SQL Server Management Studio and connect to
the SQL Server instance using user “sa” in primary node of the cluster.

Note: We have to ensure the full backup of databases before
creating and configuring SQL Server Always On Availability Group.
Step 5: Expand the Always On High Availability folder and
right-click on the Availability Group folder and select New Availability Group
Wizard to create new availability group. In our case, we inserted the cluster
name “AG_DEMO”, cluster type none and click on Database level health detection
before process next button.

Step 6: Now check the box of databases you want to include
in your Always On Availability group. All of the databases in your instance
will show up in this list. Selected database will be included in the Always On Availability
group.

Step 7: The primary replica is primary source server or
production server. A secondary replica is a server which contain replicated
data of the primary database. In our case, MSSQL01 is our primary replica and
MSSQL02 is a secondary replica. So, we will add MSSQL02 as a secondary replica
as shown in the following fig. We can use Availability Mode as Synchronous and
Asynchronous in our configuration we used Asynchronous commit.


Step 8: There are several features we used automatic seeding
feature for our cluster configuration. Automatic seeding uses the log stream
transport to stream the backup using VDI to the secondary replica for each
database of the availability group using the configured endpoints. SQL Server
2016 introduces a new feature to initialize a secondary replica automatic
seeding.

Step 9: This is the Validation windows and make sure all
checks return successful result. We ignore the listener configuration warning
because you can configure listener setting after cluster create.

Step 10: Before clicking "Finish" to create the
Always On Availability Group, double-check that the configuration settings are
correct.

Step 11: Click "Close" after the wizard completes the creation of the Always On Availability Group.

Go into SQL Management studio and look over configuration:


Post a Comment
1 Comments
Very good. Thanks for sharing.
ReplyDelete